Suspension Set up
This page describes how I set up my Aprilia RS250. The standard settings are all
over the place, my forks were set up differently! Anyway, the adjustments are there
so you might as well play around with them. If you use it and like it, I'd like
to hear about it.
The best set up for a bike is whatever makes you go fast. There's no perfect or
universally accepted setting for a bike, any advice is only to get you into the
right ball park so you can tweak the rest for yourself and get it doing what you
want. Much of it can be done before you get to the track or go out on the road but
the final bits are a matter of taste and style and have to be done in the field.
So lets kick off with:
Static Sag
There are two way of setting this, with the rider and without, first the without
way: Get yourself a assistant and get him to lift the front of the bike off the
ground (or pivot it on the side stand). Measure the distance from the wheel spindle
to something that's fixed on the bike and not on the suspension, the handle bar
for instance (I used an allen bolt on the fairing. Now put the bike back on the
floor and squish the forks a few times to get them to settle and measure the distance
again. Subtract the second number from the first and you have static sag without
the rider for the front. If it's larger than 15-25mm (which it almost definitely
will be if it's still on the standard setting) then you'll need to adjust the preload.
It's a good idea to balance the forks before you start playing with them and take
a note of what they're set on so you can put it back if it's not to your taste so
undo the preload adjusters until they hit the stops then go back on the same amount
of turns (but equal on both forks). It's the huge nut on the top of the forks. Add
a couple of turn onto your first setting and measure it again. Do the same for the
back but set it to less than 5mm and use that big nut on the shock to adjust. Get
the right tool and don't belt it with a screw driver and hammer!
The other way is 'static sag with the rider'. Again you'll need an assistant. Sit
yourself on the bike in your riding kit and in your riding position and get your
assistant to measure how much the suspension drops. You can use a zip tie around
the front forks but you'll need help with the back. Same arrangement as above, use
something fixed to the bike as a reference point. Aim for 32mm on the front and
27mm on the back.
You can use either way, but I think the second is probably better as it's setting
the bike up for your weight. It's good to remember that this isn't going to stop
the forks or shock from bottoming out in extreme circumstances. Landing a wheelie,
big pot holes and the dip after Paddock Hill bend at Brands is probably still going
to hit the stops so try to resist tightening the springs up if this happens but
pay attention to usual riding manoeuvres like braking. If you're hitting the stops
under braking (you'll probably fall off!) you should increase the preload (or compression).
Strapping a zip tie around the fork leg is useful to see how much travel you're
getting. Ideally, you should be getting almost the whole amount of travel but without
bottoming out.
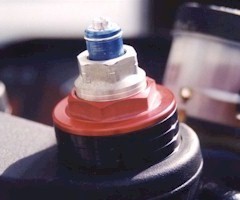

The silver nut on top of the forks and the double blue nut on the shock adjusts
preload.
Rebound
(the slot screw at the bottom of the forks, clockwise for harder and the slot screw
at the bottom of the shock on the rear)
Rebound is the ability of the suspension to recover after compression. Obviously
you want it to recover as fast as possible but if its too much the suspension will
be forced up and cause it to jump, making it unstable. If it's too little then the
suspension won't have time to recover and will be forced to compress further and
further so it'll bottom out.
Too much rebound, rear:
Jumps over bumps
Judders under braking
Holds the back down and makes the bike under steer
Too much rebound, front:
Overseer
Front tucks under
Poor front grip
Too little rebound, rear:
The suspension can top out under braking
The bike feels unstable
Too little rebound, front:
Under steer
The front can feel unstable

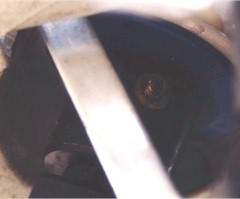
Slot screw on the bottom of the forks and shock adjusts rebound.
Compression
(the slot screw at the top of the forks, clockwise for harder and the red knurled
knob for the rear)
Compression is the suspensions ability to cope with bumps. When the wheel is hit
by a bump you want the fork to absorb the impact and keep the wheel on the road.
If compression is too soft then the force will cause too much travel in the fork
and the wheel could leave the ground. But if you don't have enough compression then
the force will go up through the bike and make the ride harsh and cause the rear
to slide under acceleration.
Too much compression, rear:
The rear wheel slides under acceleration
Harsh ride
Too much compression, front:
Good results during braking
Harsh Ride
Too little compression, rear:
Rear wheel bumps sideways under acceleration out of corners
The rear can drop too much causing the front to loose grip
Too little compression, front:
Too much diving from the forks
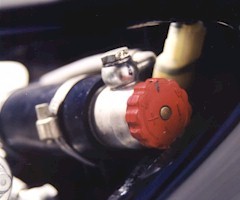
Slot screw on the very top of the forks and the big red knob adjusts compression.
Final Setup
My Setup
This is what I used for my first track day and it felt fine. It was wet so difficult
to say if it was any good for the dry. The magazines suggest a harder rear setting
so that's listed after mine.
My Front
Preload - 2 hoops visible
Compression - three quarters of a turn from softest
Rebound - one and a half turns from softest
My Rear
Preload - 17mm of thread visible above the nut
Compression - one turn and six clicks from minimum
Rebound - three whole turns out (ie, screw it all the way in then 3 turns out)
Suggested Front
Static sag (with rider) - 32mm
Compression - half a turn off maximum
Rebound - three quarters of a turn off maximum
Suggested Rear
Static sag with rider - 27mm
Compression - seven clicks off maximum
Rebound - eight clicks off maximum
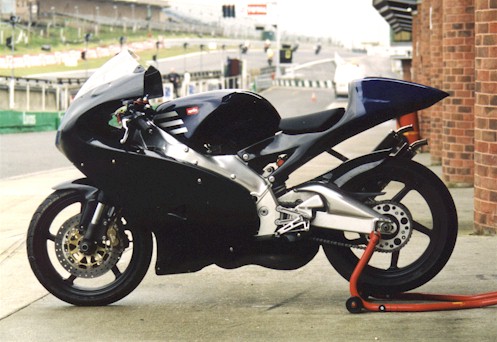
All set up and ready to go.
|